Mutated Tim by Tim Churches is a clone of the first version of the Tides module from Mutable Instruments by Émilie Gillet. Tim also ran a project called Mutated Mutables where he created a couple of alternative firmwares for the MI Braids (Bees-in-the-trees) and MI Peaks (Dead man’s catch).
Tides is all about waves that go up and down, from minute-long cycles to audio rates… This module is Mutable Instruments’ unique take on the looping AD envelope generator – pushing this well-known trope to unknown territories.
https://mutable-instruments.net/modules/tides1/
Mutated Tim is pretty much a straight clone of Tides and relies on the existing documentation from Mutable Instruments. What I haven’t figured out just yet is if he also forked out the firmware from Émilie’s original or not. We’ll get to that… Anyhow, I’ll be basing my build on the original MI documentation.
Soldering
Boards of this size I usually do with hot plate and hot air, but at the moment I don’t have any good space for that so I’ll be hand soldering. I find it easiest to start with the trickiest components, such as MCU’s, DAC’s, op amp’s and other IC’s, for two reasons; firstly you have plenty of space and and secondly, if you cock up you only lose couple of components (and maybe the PCB) plus a little bit of time instead of the whole shazam.
I won’t go into detail on drag soldering IC’s. There’s plenty of videos on Youtube explaining the pros and cons of different techniques. Everyone does it a bit differently and you’ll find your own preferred way of doing it. Larger IC’s (SOIC’s for instance) I start by soldering one pin so I can orient them correctly before soldering the rest of the pins. Components with finer pitch (QFP packages) I like to secure with kapton tape and then solder one side. I find that easier than trying to hold them down with pliers while soldering a couple of corner pins for keeping them in place. I always check for short circuits before moving on to the next side and sometimes also for continuity to adjacent components.
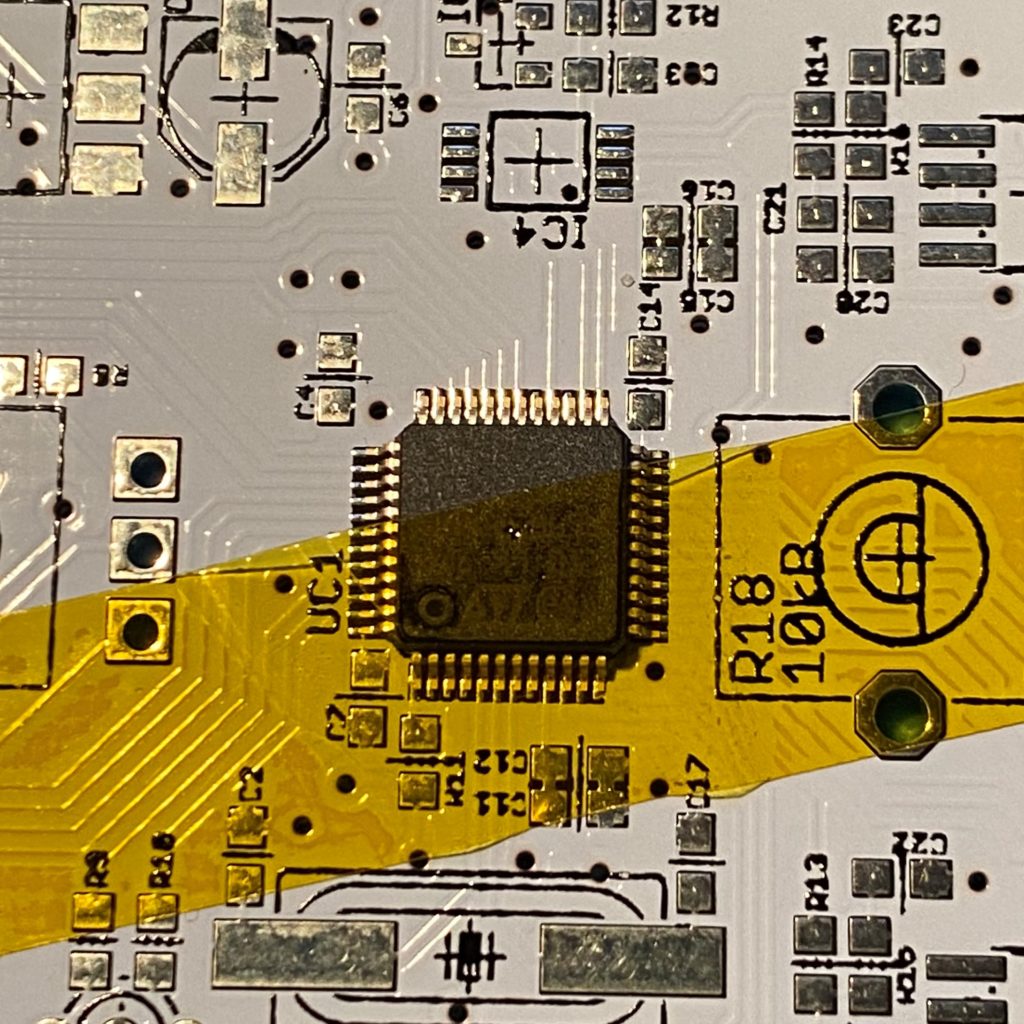
As you can see in the picture above I’ve soldered a few passives before finishing with the IC’s. In this case you can see that there’s a handful of passives tucked in between the MCU and the crystal. Sometimes you’ve got to do it differently. (For me) it would have been harder soldering the passives having the crystal already in place. So, it’s really from board to board what works best.
Commonly I leave the electrolytic capacitors until last. But then again, from time to time it might be preferable to swap the order.
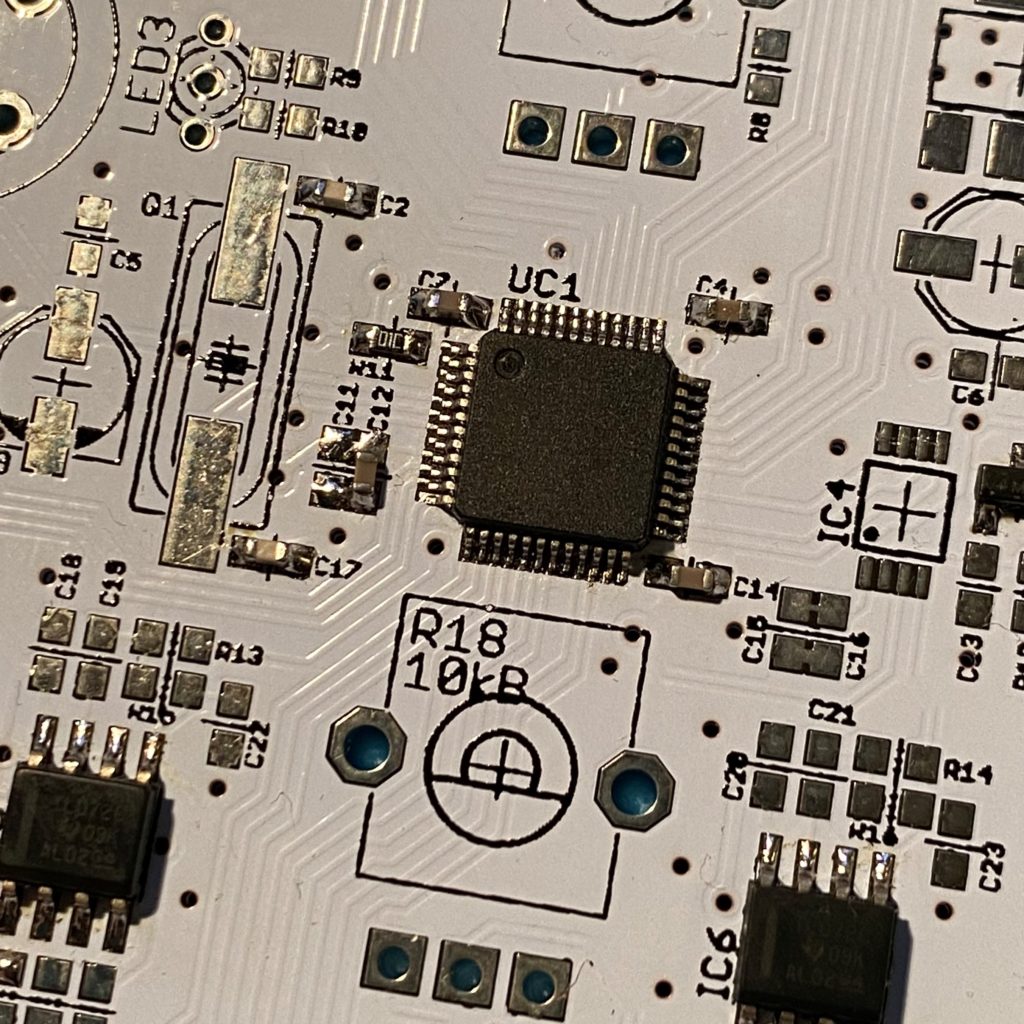
Once all the SMT components are in place, inspect your work, both visually and with a multimeter. Check for solder bridges and shorts. Reflow any suspicious joints and clean the board before moving on to the through hole components.
To flux or not to flux..?
I have a love hate relationship with flux. A friend once made a parable to steak and beer. You know when you can’t stuff any more of that delicious steak? Have a couple of gulps of beer et voilà you can down some more meat. The steak is your solder and the beer is your flux.
I don’t like cleaning the PCB so I try to rely on the flux in the solder but with IC’s I do use when necessary or just to clean up the soldering. Also when you have tiny joints on a large ground plane some extra flux can save you from a crappy joint.
Cleaning up
At this point you can use an ultrasonic cleaner, if you’ve got one at hand, but a mild detergent, a soft toothbrush and lots of water works magic. Note; what you use for cleaning the board depends on what kind of solder and flux you’ve used. Read the specs! For instance; isopropyl alcohol doesn’t work on no-clean flux. It will just smear and create a gooey surface.


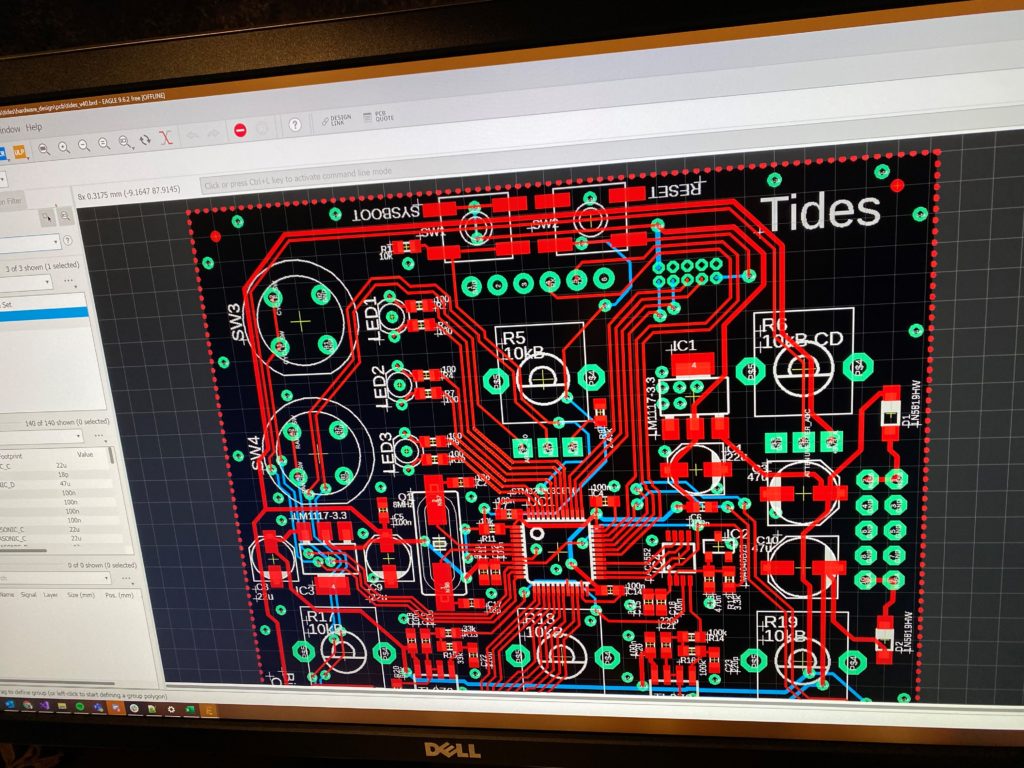
Tides only has just over 100 surface mounted components so it’s not a crowded board making it a decent module to take on once you feel fairly comfortable doing SMT work.
Finishing up
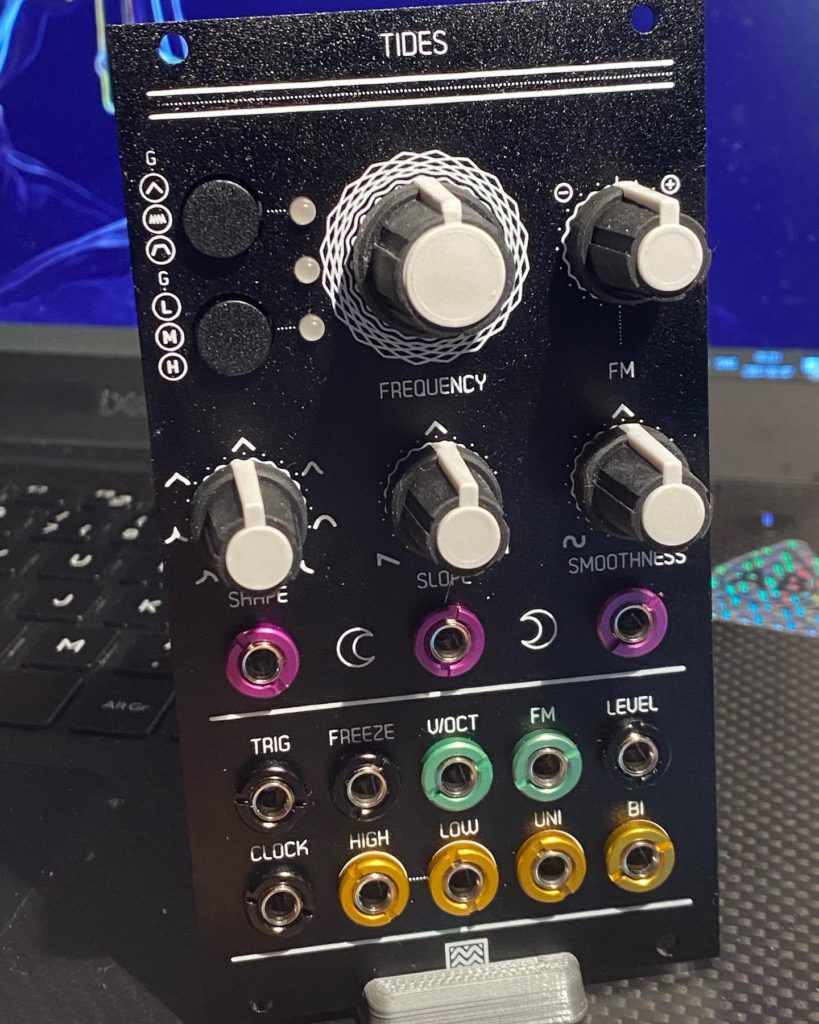
Solder the through hole components in any order that works for you and again, when you’re done check your joints and look for shorts, mount the panel, chuck in the knobs and enjoy your newly built Mutable Tim/Tides module.
Ok, so yes… There’s another step before you’re entirely done. You have to program the microcontroller and possibly calibrate the module.
I will cover the programming ATmega and STM microcontrollers in another post (or posts) since the process is (more or less) the same for all MI modules.
Tides is a fairly complex module with a multitude of functions and if that’s not enough there are alternative firmwares that you can run, like Parasites for instance, that give you even more possibilities. The video above explores Tides as an oscillator, but there are tons of other clips on the versatility of Tides.
Dig in and dive into the incoming tidal waves…
Be First to Comment